If you love the rich, indulgent combination of chocolate and peanut butter, this layered dessert is about to become your go-to treat. It’s creamy, slightly crunchy, perfectly sweet, and incredibly satisfying. Best of all, it looks impressive but is surprisingly easy to make at home.
🍫🥜 Layered Chocolate and Peanut Butter Dessert
🕒 Preparation Time
- Prep Time: 25 minutes
- Chill Time: 2–4 hours
- Total Time: ~3 hours
🍽️ Serving Size
Serves 8–10 people
🧾 Ingredients You Will Need
🧈 Base Layer (Crunchy Foundation)
- 2 cups crushed chocolate cookies (or biscuits)
- 6 tablespoons melted butter
- 2 tablespoons sugar (optional)
🥜 Peanut Butter Cream Layer
- 1 cup creamy peanut butter
- 1 cup cream cheese (softened)
- 1 cup powdered sugar
- 1 teaspoon vanilla extract
- 1 cup whipped cream (or whipped topping)
🍫 Chocolate Layer
- 1 ½ cups semi-sweet chocolate chips
- 1 cup heavy cream
- 1 teaspoon vanilla extract
☁️ Top Layer (Light & Fluffy)
- 1 ½ cups whipped cream
- 2 tablespoons powdered sugar
✨ Optional Garnish
- Chocolate shavings
- Crushed peanuts
- Peanut butter drizzle
- Cocoa powder dust
👩🍳 Step-by-Step Method
Step 1: Prepare the Base Layer
In a mixing bowl, combine crushed chocolate cookies with melted butter. Stir until the texture resembles wet sand.
Press the mixture firmly into the bottom of a baking dish or serving pan to create an even layer.
👉 Pro Tip: Use the back of a spoon or a flat glass to compact the base tightly—this prevents crumbling later.
Place in the refrigerator for 15–20 minutes to set.
Step 2: Make the Peanut Butter Cream Layer
In a large bowl:
- Beat cream cheese until smooth
- Add peanut butter and mix until creamy
- Add powdered sugar and vanilla extract
Mix until fully combined and silky.
Fold in whipped cream gently to keep the mixture light and airy.
Spread this layer evenly over the chilled base.
👉 Tip: Use a spatula and spread slowly to avoid disturbing the crust.
Return to the fridge while preparing the next layer.
Step 3: Prepare the Chocolate Ganache Layer
Heat heavy cream until warm (not boiling). Pour it over chocolate chips in a bowl.
Let sit for 2–3 minutes, then stir until smooth and glossy. Add vanilla extract.
Allow the ganache to cool slightly before pouring.
Step 4: Add the Chocolate Layer
Pour the chocolate ganache over the peanut butter layer.
Spread gently to create a smooth, even surface.
👉 Important: Make sure the ganache is not too hot—it could melt the layer beneath.
Refrigerate for 30–45 minutes until slightly firm.
Step 5: Prepare the Top Layer
Whip cream with powdered sugar until soft peaks form.
Spread evenly over the chocolate layer.
Step 6: Garnish and Decorate
This is where you can get creative:
- Sprinkle chocolate shavings
- Add crushed peanuts for crunch
- Drizzle melted peanut butter
- Dust lightly with cocoa powder
Step 7: Chill and Set
Refrigerate the dessert for at least 2–4 hours (overnight is even better).
This allows layers to firm up and flavors to blend beautifully.
Step 8: Slice and Serve
Cut into squares or slices using a sharp knife.
👉 Tip: Wipe the knife between cuts for clean, professional-looking slices.
Serve chilled.
🌟 Why This Recipe Is Special
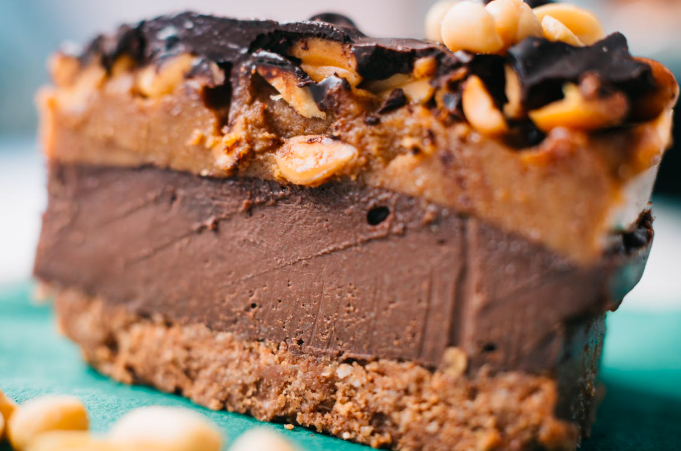
This dessert stands out because it perfectly balances:
✔ Texture Contrast
- Crunchy base
- Creamy peanut butter layer
- Smooth chocolate ganache
- Light whipped topping
✔ Flavor Harmony
The richness of chocolate pairs beautifully with the salty-sweet depth of peanut butter.
✔ No Baking Required
Perfect for beginners or when you don’t want to use the oven.
✔ Make-Ahead Friendly
It actually tastes better after chilling—ideal for parties or gatherings.
💡 Extra Tips for Better Taste
1. Use High-Quality Chocolate
Better chocolate = richer ganache.
2. Add a Pinch of Salt
A small pinch enhances both chocolate and peanut butter flavors.
3. Chill Between Layers
This keeps layers clean and prevents mixing.
4. Try Different Bases
Swap chocolate cookies for:
- Graham crackers
- Oreo-style cookies
- Digestive biscuits
5. Add a Crunch Layer
Sprinkle chopped peanuts or chocolate chips between layers.
6. Use Natural Peanut Butter Carefully
If too oily, stir well before using to maintain consistency.
7. Serve Slightly Chilled, Not Frozen
Freezing dulls the creamy texture—refrigeration is best.
🔄 Creative Variations
🍌 Banana Chocolate Peanut Butter Dessert
Add sliced bananas between layers.
🍯 Salted Caramel Twist
Drizzle caramel sauce between layers.
🥥 Coconut Version
Add shredded coconut for a tropical touch.
🍓 Berry Fusion
Top with strawberries or raspberries for freshness.
🥗 Nutrition Details (Approximate per Serving)
- Calories: 420–500 kcal
- Fat: 28g
- Carbohydrates: 40g
- Sugar: 28g
- Protein: 8g
👉 Note: Values vary depending on ingredients used.
❓ FAQs
1. Can I make this dessert ahead of time?
Yes! It’s actually better when made a day in advance.
2. Can I freeze this dessert?
You can, but refrigeration is recommended for best texture.
3. What if I don’t have cream cheese?
You can substitute with mascarpone or whipped cream, but texture will differ.
4. How long does it last?
Stored in the fridge, it stays fresh for 3–4 days.
5. Can I use crunchy peanut butter?
Absolutely! It adds extra texture.
6. Is this dessert overly sweet?
Not if balanced correctly. Use semi-sweet chocolate and adjust sugar if needed.
7. Can I make it gluten-free?
Yes—just use gluten-free cookies for the base.
8. What size pan should I use?
An 8×8 or 9×9-inch pan works best for thick layers.
🎉 Final Thoughts
This layered chocolate and peanut butter dessert is more than just a sweet treat—it’s a show-stopping centerpiece that combines flavor, texture, and visual appeal. Whether you’re making it for a party, family gathering, or simply to satisfy a craving, it delivers every time.
With its no-bake simplicity and rich, indulgent layers, this dessert proves that you don’t need complicated techniques to create something extraordinary. Follow the steps, use quality ingredients, and enjoy every delicious bite.